So you’ve just created an amazing app that you believe will revolutionise the way that people will do things? You’ve gathered intensive user feedback in its design and you’ve used the most up-to-date technologies in its development. But there’s a problem – no-one can use it.
The reason no-one can use the app is because it hasn’t yet been published to an app store.
In this guide we will cover:
- What is an app store?
- What are the best app stores and what is the criteria around this?
- How to submit apps to the Google Play Store, Apple App Store and Amazon Appstore and the differences between these
- & Why are apps rejected from app stores?
What is an app store?
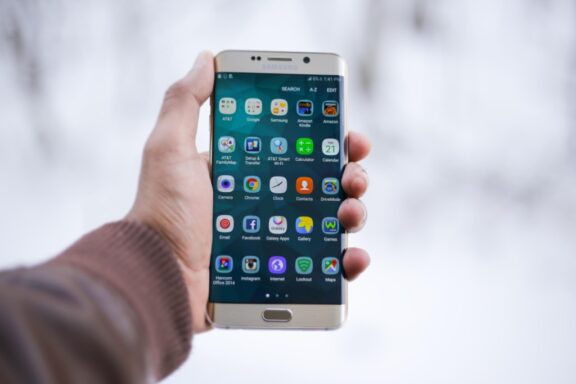
An app store is a digital marketplace, also known as an online shop or app marketplace, in which customers can browse and download apps intended for mobile devices, tablets, computers and other smart devices. These apps are generally designed to run on specific operating systems such as iOS, macOS, Android, Windows and more and tend to have their own app store portals. The main difference between an app store and a physical marketplace is that many apps in app stores are free. Regardless, customers need to know about them and how to obtain them, both of which require an app store.
What are the best app stores?
There is a long list of app stores that are said to be “the best” around the world – which are listed below.
- Google Play Store
- Apple App Store
- Samsung Galaxy Store
- LG SmartWorld
- Huawei AppGallery
- Sony Apps
- Amazon Appstore
- Aptoide
- F-Droid
- GetJar
- ACMarket
- SlideME
- Uptodown Market
- Itch.io
- Cydia
- neXva
- Bemodi
- AppBrain
- 1Mobile
- Appolicious
- Kongregate
- CodeNgo
- Appland
- GetJar
- Opera Mobile Store
- Appszoom
- BlackBerry World
- Tencent Myapp
- 360
- Baidu
- Oppo
- AppChina
- VIVO
- PP Assistant
- Wandoujia
- HiAPK
- Flyme
- HiMarket
- 2345
- Coolmart
- Anzhi Market
- MaoPao
However, in the context of app stores, answering this analytically, the best app store is one that is able to answer the following questions well:
- Is the app store safe?
- How many apps are currently in the store?
- Is it Android, iOS or cross-platform?
It is also worth noting that many app stores concentrate solely not only on one platform, but one one family of devices. Examples of these include Samsung Galaxy Store, Huawei AppGallery and Amazon Appstore. The device to which you wish to publish needs to be considered when submitting an app to that device’s app store.
Is the app store safe?
App stores host thousands, if not millions, of apps from a range of developers. If your app is submitted, what will happen?
Firstly, there is little need to worry: any apps that are already on an app store have been rigorously tested for safety, usability and security of the apps. This is why app stores require a submission and review stage, rather than providing instant publication. It’s also worth mentioning that just because your app is published on an app store doesn’t mean it will be there forever as apps are constantly reviewed for quality assurance.
Moreover, operating systems such as macOS compartmentalise each app, so that errors in one app do not cascade to any others. However, in each Apple App Store, guarantee of safety is only given when the user downloads solely from the specific App Store on their Apple device.
How many apps are currently in the store?
You’ve realised that you will need to publish to an app store. But which one? In reality, there is no universal app store for all apps, and the one you pick determines your audience. The number of apps that already exist in an app store give an indication of the size of the audience. The below shows the three most popular app stores by number of apps:
| App Store | Number of Apps |
|---|---|
| Google Play | 2.56 million |
| Apple Appstore | 1.85 million |
| Amazon Appstore | 489,000 |
Source: https://www.statista.com/statistics/276623/number-of-apps-available-in-leading-app-stores/
Is it Android, iOS or cross-platform?
However, the audience of the app store is not the only factor to consider. Has the app been developed with a specific platform or device in mind? For example, is the app suited to iPhone users on iOS or Pixel users on Android? This is important to consider as it is not possible to upload an iOS app to the Play Store and vice versa.
One way to manage this is to deliberate on the release before the app is created. However, if the app is designed for users in more than one platform, then apps for each platform should be created concurrently. There are now many cross-platform frameworks to help with this, including Xamarin and ReactNative. Below are some examples of the popular apps stores in the industry and their platforms.
| App Store | Platform |
|---|---|
| Google Play | Android |
| Apple Appstore | iOS |
| Amazon Appstore | Cross-platform |
| Samsung Galaxy Store | Android |
| Huawei AppGallery | Android |
| SlideME | Android |
| GetJAR | Cross-platform |
| Opera Mobile Store | Cross-platform |
| AppLand | Cross-platform |
| Cydia | iOS |
Comparison of App Stores
Each app store is operated differently, and this is determined by the company that operates them and the platform of apps that they wish to distribute. As such, each platform will have its own distinct publication process, as shown below.
Google Play
Initially released on the 22nd October 2008, Google Play (formerly known as Android Market) is the official app store for apps developed using the Android Software Development Kit (SDK). Users download apps from the Play Store app on their Android devices.
How to Submit an App to the Google Play Store
The process below is a short version of how we submit apps to the Google Play Store.
Step 1: Register
First you need to sign up for a Google Play Developer account, if not done before. This can be done from your Google account, though it does require a $25 one-time registration fee. After you’ve signed up for a Google Play Developer account, you can upload apps to Google Play using your Play Console. When building our apps at Coderus, we use Google Play’s recommended publishing format, the Android App Bundle, as a reference.
Step 2: Create Your App
- Go to your account’s Play Console.
- Select All applications > Create application.
- Select a default language and add a title for your app. The name should be typed as you want it to appear on Google Play. Our team uses extensive research and client needs analysis to help you decide upon the branding for your app.
- Create your app’s Store Listing. The Store Listing gives people information on product details, graphic assets, languages and translations, categorisation, contact details and the privacy policy – and generally covers: what the app is for, who created the app, what the flow and screens of the app are.
- Take the content rating questionnaire. The content rating questionnaire is used to determine suitability for different audiences such as whether it is adult or child appropriate content.
- Set up pricing and distribution. In your account’s Play Console, you can set your app as paid or free, select the countries in which the app will be available and opt in to distribute your app to additional Android devices and programs.
Step 3: Release & Test Your App
Once your app is ready for testing and production, you will need to prepare and roll out releases, which are a “combination of artefacts that constitute an app or update to the end users.” These are set to internal (for an in-house team), closed (beta testers), open (wider range of users but not everyone) and production (everyone).
Step 4: Manage Android Package (APK) Files
For this, you need to ensure that the names of your app files are unique and permanent as these are FOREVER.
Step 5: Prepare App for Review
You need to prepare your app for review by ensuring you have all the necessary information required on the following:
- Privacy policy
- Ads
- App access
- Target audience and content
- Permissions declaration form
Step 6: Confirm Rollout
Select ‘Confirm rollout’ once the app has been successfully reviewed.
Throughout the process, take note of the Android developer guidelines on launching your app for the best results.
Apple App Store
The iOS app store was released on the 10th June 2008, followed by the release of the iPhone 3G the next day: this was the first iPhone to have pre-loaded support for the App Store. It started with 500 apps, and has grown to the number shown above (as of Q1, 2020).
It is also worth noting that Apple controls and regulates multiple app stores for each of its different technologies: iOS and iPadOS, macOS, watchOS and tvOS. However, this article will focus on the iOS app store.
How to Submit an App to the Apple App Store
As a member of the Apple Developer Program, we can submit apps to the Apple App Store.
This is a general overview of the process of submitting an app to the Apple App Store.
Step 1: Sign in to App Store Connect
- Add your Apple Developer Program account to your app’s Xcode project (you must ensure that your apps are built using Xcode 11, which includes SDKs for iOS 13, iPadOS, watchOS 6, tvOS 12, and macOS Catalina).
- Log into App Store Connect using the Apple Developer Program credentials.
- Join an organisation. You can do this by creating your own or being invited by another user with higher permissions.
- If your app is paid, you need to create a contract. This is under Agreements, Tax and Banking in the App Store Connect dashboard. Apple has written the process for procuring contracts. You can skip this step if your app is free.
Step 2: Add a New App
App Store Connect uses records in order to present your app on the App Store. As part of publishing your app, you will need to create a new record with the following information:
- Platform: This is which Apple platform. For mobile apps it is iOS.
- Name: This will be what people will see on the App Store and is based on user and market research.
- Primary Language
- Bundle ID: This is the app’s unique identifier that distinguishes it from all other apps. It can be found under ‘Signing and Capabilities’ in the app’s Xcode project.
- Stock Keeping Unit (SKU): This is an identifier used within an organisation/company to differentiate its products and services. This is not visible to the end user.
In order to upload your app to App Store Connect, you will first need to create an app record via the following steps.
- From My Apps in the App Store Connect, click the Add button (+) in the top-left corner. The My Apps page is blank until you create your first app record.
- From the pop-up menu, select New App. In the New App dialogue, select one or more platform(s) and enter the app information i.e. iOS, macOS or tvOS.
- Under User Access, choose Limited Access or Full Access. If you choose Limited Access, select the users that you would like to be able to access this app. Users with the Account Holder, Admin, Finance, and Access to Reports roles cannot have their app access limited, so they will see all apps.
- Click Create, and look for messages that indicate missing information.
Step 3: Enter App Information
Once you add a new app to your account, you are able to view and edit the app information and platform version information in the My Apps section.
Before you enter app information, review Apple’s documentation on the required, localizable and editable properties. Some information is required before you upload a build or submit an app for review. You can edit some properties anytime and other properties only when the app status is editable. In addition, you can localize App Store information that appears on the App Store.
The app information required includes:
- Metadata: Fill in metadata in the App Store connect dashboard and use Apple’s App Metadata Specification to complete this. In short, metadata should include information such as; the name of your app, version number, category, a detailed description and any additional keywords
- App ratings: Apple requires you to set age ratings for apps.
- Advertising identifier details
- Custom license agreement
- App store information
- App clip experience
Step 4: Add Export Compliance Information
There are a lot of legalities around publishing apps – read this guide for more information.
Step 5: Add Additional App Information
This additional information includes:
- App icon
- App previews
- App screenshots
- Device size
- Localised screenshots
- App preview poster frames
Step 6: Manage Builds of Your App
After you add an app to your account, you can upload a build with one of several upload tools (see Upload tools for more information). Later, you can upload more builds as your app changes, distribute a build for testing, or submit your app for review.
The first time you upload a build, a beta version of the app is created in your account. However, the build needs to be processed in Apple’s system before it appears in App Store Connect. You receive an email when this process is complete.
When you upload a build, the bundle ID and version number (located in the app bundle) are used to associate the build with the app and version record in App Store Connect. The build string is used to uniquely identify the build throughout the system.
Step 7: Test a Beta Version of Your App
You can learn more about your options for beta testing using TestFlight here.
Step 8: Publish on the App Store
View the process below for more details on publishing your app to the app store.
- Choose your build: Each app can have multiple versions, and each version can have multiple builds. To publish your app on the App Store, choose the build from the builds you have uploaded that you want to submit.
- Set pricing and availability: You must set a price for your app and can select specific territories for your app. Your app is available in all App Store countries and regions by default. You also have the option to publish your app as a pre-order and schedule price changes.
- Submit your app for review: You need to submit your app for review to start the App Review process and to make your app available on the App Store. You can see the approval status under Activity in the App Store Connect dashboard. Before you submit an app, enter all the required metadata and choose if you want to release your app manually or automatically, or if you want to release your app in phases.
- View your app status and resolve review issues: After you submit the app, the app status changes to Waiting for Review. If there are any issues with your app, read and reply to App Review communications. After your app is approved, it can take up to 24 hours to go live on the App Store.
- Request promo codes: After your app is approved, you can request up to 100 promo codes for every version of each platform of your app to distribute to users before you make your app available on the App Store. You can distribute the promo codes by email or other means, and the user enters the promo code when purchasing the app.
Apple has published a full guide for submitting applications for all of its platforms here.
Amazon Appstore
Released on the 22nd March 2011, the Amazon Appstore is the least well-known of the major app stores. Unlike the others, many of the apps on Appstore are paid, but by Amazon Coin. These coins are worth 1 cent (USD) each.
How to Submit an App to the Amazon Appstore
Step 1: Log in and Add an App
- Log into the Developer Console. Create an account if needed: Amazon can sync this to your consumer amazon.com account if you have one.
- From the Dashboard click Add a New App drop down menu and choose the best option/correct platform; Android (refers to Java-based Android apps, usually created with Android Studio) or Mobile Web (refers to HTML5 web apps, created with HTML, JavaScript, and CSS)
Step 2: Add General Information
Next you need to add the General Information, which includes:
- App title
- App SKU
- App category
- Developer Publishing API keys
- Customer support contact
- Customer support email address
- Customer support phone
- Customer support website
Step 3: Add Availability & Pricing
For this, you will need to answer the following questions:
- Where would you like the app to be available?
- Is your app free or paid?
- When would you like publishing to start?
By default, your app will be available in all countries unless specified otherwise.
Step 4: Add Descriptions
The descriptions you need to fill out include:
- Release Notes
- Display Title
- Short Description (TV and tablet devices)
- Long Description (Amazon website users)
- Product Feature Bullets (3 to 5 key features of your app)
- Keywords (words to help users easily find your app)
Step 5: Add Images & Multimedia
This section is important because it represents your app and is used for promotional purposes. You want to include:
- Icons
- 10 Screenshots
- Promotional Image
- Video
- Fire TV Assets (if relevant)
Step 6: Add Content Rating
Please check Amazon’s content guidelines for more information on how to ensure the rating is appropriate.
Step 7: Upload App Files
This will vary according to the platform.
Step 8: Submit Your App & Check Status
You can check the status of your submission from the Developer Console.
Why are apps rejected from the Apple App Store and Google Play Store?
Now that we have covered the process, what if your app gets rejected and why do apps normally get rejected?
The App Includes Offensive Content
Content that is offensive, objectionable or improper can lead to your application being rejected or removed from the app store. This includes content that is:
- Bigoted, racist, sexist or homophobic references
- Sexual or pornographic material
- Comments inciting religious intolerance
- Erroneous and false information
- Child endangerment
- Violence and terrorism
- Bullying and harassment
Our team thoroughly reviews all of the apps we release and will ensure you are not submitting an app that will be rejected or removed from the app store of your choosing.
The App Violates User Generated Content Guidelines
User generated apps and social networks can present many challenges ranging from intellectual property infringement to anonymous cyberbullying.
The App is an Intellectual Property Infringement
Apps that impeach IP rights of others such as trademark, copyright, patent or any other proprietary right are not allowed on an app store.
The App Risks Physical Harm
Apps that have major risks and need to be approached carefully and in some cases are banned include:
- Medical apps
- Drug dosage calculators
- Apps encouraging consumption of tobacco products, alcohol and illegal drugs
- Apps encouraging consumers to participate in bets, challenges, dares etc.
The App Doesn’t Include Developer Information
Users need to be able to reach you about questions and support issues. This is a legal requirement in some countries.
The App is Not Secure
Every app should have the proper data security measures in place to ensure proper handling of user information. As an organisation with multiple ISO certifications, this security is part of our process.
The App is Not Unique & Lacks Functionality
App stores want to give users a good user experience and to do this, they need to deliver users apps with unique content and functions.
Summary
For more information on specific store rejections view below:
Next steps?
Although we’ve created this guide to publishing your app onto the app store – for some businesses this process is a bit more complicated, which is where we can come in. We are also equipped to help with app updates and can cover the entire process for you. There is a lot to get up to speed with mobile, so you may need some support in order to do what is best for you. At Coderus, we can support you in a way tailored to your needs: we pride ourselves on our mobile development services, with distinct iOS and Android teams.
